

All about Gel-X Nails
January 17, 2023
Are you sick of paying $60-70 dollars for nails that almost never come out exactly how you want?
Have you ever wanted to do them yourself but hated the smell of acrylic or can’t get them perfect?
There is a new way to do your nails, try Gel-x.
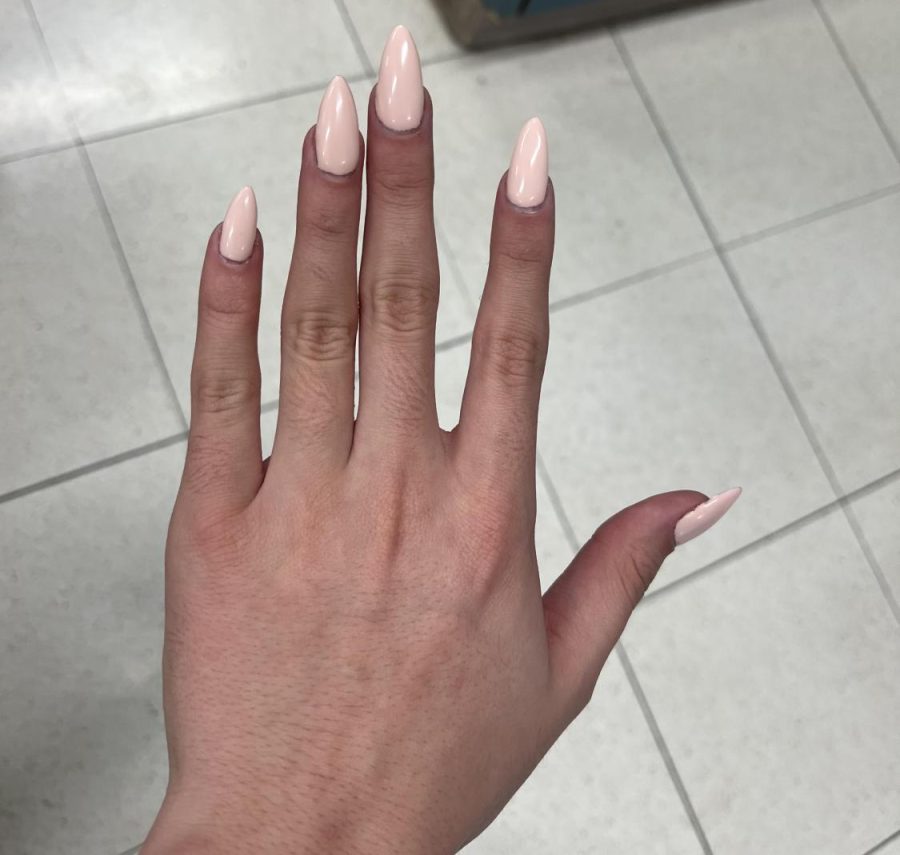
Gel-x nails are full-cover gel tips that you adhere to your nails. And if you do everything correctly, they can last just as long as acrylics!
Some things you will need are:
- Full-cover gel nail tips
- Light-Emitting Diode (LED) lamp
- Gel nail polishes
- Nail dehydrator/ Nail polish remover
- Nail primer
- Nail drill
- Nail file
- Flash cure nail lamp
- Gel or regular nail polish
- Gel or regular nail polish top coat
- Cuticle oil and pusher
Most, if not all, of the materials you can find on Amazon.
First, you should buff your nails to remove the shine but don’t go rough enough to thin your nails. This can be easily done with a nail file, a buffing block, or a nail drill.
After that, you should push your cuticles back with a cuticle pusher.
Then you will want to get a nail dehydrator, or you can use regular nail polish remover anything that can get the oils off your nails so they adhere better to your nails.
Next, you put your nail primer on, then put hard gel on all your nails and put them in your LED lamp, and let them cure for 60 seconds.
When your hard gel is fully cured you want to fill your full cover tips apex with your hard gel and place it lightly on your nail so that there are no air bubbles because that can give you an allergic reaction or even nail fungus.
After you make sure there are no air bubbles, use your flash cure nail lamp to flash cure your nail for 15 seconds. Repeat those steps with each nail.
After you have every nail on, put one hand at a time in your full-sized nail lamp and let them completely cure for 60 seconds.
If you don’t do that step the gel won’t fully cure, which can lead to them popping off or an infection.
If you have any gel that leaked from your application, you can use your nail drill to make it look cleaner.
Next buff and shape your nails to your desired length and shape, then wash your hands so that you don’t get the dust in your paint.
You can also use your nail drill to thin out your gel extension by your cuticle so they grow out seamlessly.
When you have done all that, it is time to paint your nails. You can use gel or regular nail polish, but gel lasts longer and does not chip.
If you want a design, you can look online for inspiration pictures or try your own design, but solid colors are much easier for your first few times!
Make sure when you are done painting to end with a top coat; this is important for both gel and regular polish to prevent chipping. You can also get a different finish with different top coats. You can get glitter, glossy, matte, and many more different kinds of top coats.
Finally, you will want to end with cuticle oil; the oil will help improve the health and appearance of your nail. Cuticle oil can also protect your polish for a lasting shine.
All of this will come out to $100-200 dollars and you can get about 25 sets depending on how many tips you get. $100 dollars would get you maybe two sets at the salon.
Doing your own nails also gives you something to do and something to get good at. When you get better you can even do your friend’s nails, too!
Lastly, Gel-x is a lot more gentle on your nails and won’t ruin your nails as some acrylic nails do.